Sunday, February 27, 2011
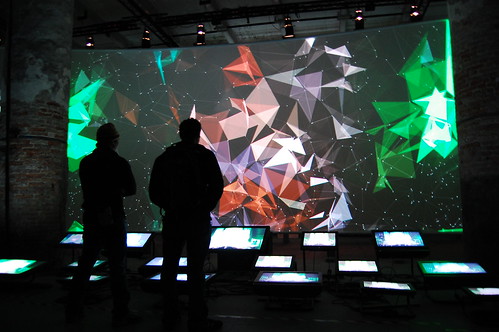
Exhibition Shots!
Tuesday, February 8, 2011
Final Presentation: 1 - 5pm Thursday, 10th February
Tuesday, January 25, 2011
Some more on 3D Printing
Thursday, January 20, 2011
Tasks for Friday 21st January - Final Class!!!
- Have your proposals checked and approved by the tutors.
- Hand in any final outputs from Assignment 1 or Assignment 2 that have not yet been submitted.
- ...
- ...
- ...
- Have a drink at the Uni Bar!
- ...
- Thank you all for a most enjoyable course, and we look forward to seeing what is produced for your final projects!
- ...
- Good Luck!
Costing for 3D Printed Models
| Name | Cost | Paid |
| Jackey Yuen | $84.70 | Y |
| Joseph Mammone | $64.90 | N |
| Tri Pham | $74.80 | Y |
| Ernest Fratczak | $72.60 | Y |
| Chris Freeburn | $77.00 | Y |
| Ivette Bechara | $86.90 | Y |
| Yi Zhang | $69.30 | Y |
| Vu Khiem Nguyen | $82.50 | Y |
| Liyi Zhang | $74.80 | Y |
| Brandan Villatora | $94.60 | Y |
| Marcus Hoon | $79.20 | Y |
| James Chang | $67.10 | N |
| Alex Ng | $71.50 | Y |
| Charles Estephen | $72.60 | N |
| Alfie Arcuri | $75.90 | Y |
| Xin Liu | $71.50 | Y |
| Michael Diedricks | $73.70 | Y |
| Veronica Ho | $71.50 | Y |
| Stephanie Chiu | $67.10 | Y |
| Jakub Beseda | $68.20 | Y |
| Hamid Hamavi | $69.30 | Y |
| Terrence Wong | $74.80 | Y |
| Wen Jun Hu | $77.00 | Y |
Tuesday, January 18, 2011
AR - Automatic Trying on Glasses
Automatic Trying on Glasses
http://demos.t-immersion.com/
go to the bottom example...
Assignmnet 3 Brief - PDF link
ARCH0006_Assignmnet3_Brief.pdf
Tasks for Wednesday 19th January
- Resubmit Assignment 2 using the "Assignment 2 Resubmission" post as a guide.
- Discuss your proposals/projects for the final Assignment with the tutors.
- Based on your proposals or the Assignment Brief, start to sketch out ideas and gather visual/reference material to support your concept.
- Submit your Augmented Reality Marker System from Assignment 2 to Jeremy or Josh.
- Complete, post to your blog and bring in your Proposal for Assignment 3 for Friday's last class to discuss with the tutors.
Assignment 2 Resubmission
To do this you will need to locate the BuildAR program files folder, create a folder with your student number and name, have all content for your AR Installation in that folder, then save the BuildAR *.xml file in the scenes folder.
- go to : C:\Program Files (x86)\BuildAR\data\scenes
- Create a folder with your Student Number and Name in the scenes folder (1234567_JohnSmith)
- save/copy all of your model and pattern files in your newly created folder
- save your *.xml file in the scenes folder with your student number and name (1234567_JohnSmith.xml)
- so you should have:
- C:\Program Files (x86)\BuildAR\data\scenes\1234567_JohnSmith\(all of your content)
- C:\Program Files (x86)\BuildAR\data\scenes\1234567_JohnSmith.xml
- C:\Program Files (x86)\BuildAR\data\scenes\1234567_JohnSmith\(all of your content)
- zip up the folder and file and resubmit to: ftp://emustore.fbe.unsw.edu.au/Submit/ARCH0006 - 9006 Harkins Harle 2011/Assignmnet 2
- Hand in your physical marker system to Jeremy or Josh!
Wednesday 19th 1pm - iCinema Demo


Here is an excerpt from the website http://www.icinema.unsw.edu.au/index.html:
“The iCinema Centre for Interactive Cinema Research, established in 2002, is a joint venture of the College of Fine Arts, Faculty of Engineering and the Faculty of Arts and Social Sciences at the University of New South Wales. It brings together researchers and postgraduate students in new media, aesthetics, cinematic theory, multimedia design, computer science, cognitive science, software/hardware engineering and mining virtual reality.
The iCinema research program focuses on research into digital interactivity for benchmark applications across the arts, culture and industry. In particular, it is focused on the way the digital can be used to imagine new ways of living in the contemporary world, redefining how we seek recreation and learning, and the way we work and do business.”
Monday, January 17, 2011
Installation 3 - A Reality Mash-Up - Short Brief
For this assignment you will need to bring the skills that you have developed over the last two weeks into polished final Design Presentation. Aiming to utilise technologies from Photogrammetric Reconstructions to Augmented Reality you will deliver an Architectural Installation that explores a design development in context to future design presentation methods.
The main idea of this assignment will be to “Mash-Up” a range of physical and digital processes into an Architectural Intervention Installation for display at the final exhibition.
As an idea of what may be possible, we are proposing a Photogrammetry/Augmented Reality Mash-Up that utilises all of the skills you have developed in this course so far.
In this “standard” project, we expect you to choose an architecture of interest, photogrametrically reconstruct the architecture (using modelling skills to help to refine your model to the most efficient printing arrangement), alter the model as suits your purposes and get a 3D print of your model. Using that as a basis for your project you will then go through the design process, “designing” your Architectural Intervention on your chosen architecture, and developing a range of iterative design possibilities that can be tested against your 3D printed model using Augmented Reality.
It is expected that you will spend between 30 to 50 hours working on this final Assignment over the next 2 weeks.
This is just the “standard” approach that you may take to your final Assignment. Your other option is to write a proposal of what you would like to achieve.
Your proposal must be a minimum of 250 words long. In addition to a 250 word description you will need to provide us with assessment criteria on what aspect of the technology you will be concentrating on as well as outcomes that you expect to be able to achieve with your project (what you will be producing). You will have to thin kabout how your project can be displayed in an exhibition setting.
Design Inspiration

- An excerpt from Gaston Bachelard's "Poetics of Space" (found here)
Thursday, January 13, 2011
Tasks for Friday 14th January
- Produce concept sketches for how your Augmented Reality Installation will work (post to your blog).
- Choose your subject matter for the second Assignment and start to consider how your your models will interact with your markers. You may want to provide sketches of your ideas.
- Begin constructing your 3D models and your Augmented Reality Installation using a modeling program and BuildAR, testing your ideas, model scales, any animations etc. as you proceed. Remember to document your processes and provide images of your work on your blog.
- As you decide on your subject matter, start to develop your markers for your installation, and consider the overall package of your Assignment 2 Submission.
Example Assignment 1 Post
Animation in BuildAR
You can export your scene directly to IVE by installing the OSGExp plugin available from http://sourceforge.net/apps/mediawiki/osgmaxexp/
Assignmnet 2 Brief - PDF Link
ARCH0006_Assignmnet2_Brief.pdf
Wednesday, January 12, 2011
Combined Blog Feed
Tuesday, January 11, 2011
BuildAR and Layar Task Guides
- Got to http://www.buildar.co.nz/ to get the BuildAR application, and watch the tutorials. There is a Free Version, which has limited functionality, but will suit your purposes, or there is a Free Demo of the Pro version, which has some extra features, but is "save" disabled. I suggest the Free Version to start with, but you may like to also try the Demo Pro version fro the added extras.
- Find an interesting building on Google Warehouse, and open it in Sketchup. Export the model as an OBJ.
(alternatively you can use your 3D reconstructed building model from last week) - Bring the OBJ model into BuildAR and visualize it using the "HIRO" marker. (The website tutorials will show you how to do this)
- Sign up for an account on http://pipes.yahoo.com/pipes/
- Take a look at the pipe used in the demo: http://pipes.yahoo.com/pipes/pipe.info?_id=ded88584ab21d380387f9e6655f3c846, and the source: http://pipes.yahoo.com/pipes/pipe.edit?_id=ded88584ab21d380387f9e6655f3c846
- Clone this pipe, and "Run Pipe" to see the 3 outputs in the map view.
- Open Google Maps in a new tab, and find the first point you'd like to add to the Layer. This should be within 10km of us. Right-click on the point and select "What is here?" to get the Latitude and Longitude.
- Go back into the Yahoo Pipe source
- Copy your latitude and longitude into the lat and long boxes on example georss item (the one with the image, not the sound)
- rename the item, and fill in a description and image link to go with your location.
- Add more "georss item builder" boxes. (these can be found by searching for "georss item" in the top right,and pulling them onto the main workarea), and enter other locations.
- Run the pipe and check the map view to make sure everything is where it should be.
- Right-click on "Get RSS feed", and copy the URL.
- Open http://tinyurl.com/ in a new tab, and paste the RSS URL into the box. Make a note of the tiny URL that is output.
- Test on a phone: Make sure you have the Layar App installed (it's free via app store), open Layar, search for the "GeoRSS gateway" layer, and open it. Click the gear icon and enter the tiny URL into the location box. Make sure "force cache refresh" is selected, and the search area is large enough. Your points should show up!
Tasks for Wednesday 12th January
- Find a video of interest of a real example of Augmented Reality being used, and post to your blog as an idea generator.
- Find a significant piece of architecture from Google Warehouse
- Visualise in BuildAR using Augmented Reality
- Post a minimum of 3 images of your Augmented Reality builduing to your blogs.
Layar GeoRSS
- Locate 5 places of interest on campus or around Kingsford/Randwick
- Tag images with and information... be creative (eg... a food hall you may want to tag with an image of a hamburger..., or the Red Centre you may want to tag with an image of Uluru, or an arty looking person wearing black)
- You can provide links to content on the web... for example Youtube video or a website.
- Finish your model for 3D printing.... if you have not already done so.
Monday, January 10, 2011
Augmented Reality: Layar, Junaio, Markers
Adding computer-generated content to the world.
Augmented (hyper)Reality: Domestic Robocop from Keiichi Matsuda on Vimeo.
Tools we will be using...
1) BuildAR - Markers, on the desktop
BuildAR Test from Eric Anastas on Vimeo.
2) Layar - Points, on a mobile platform
3) Layar - 3D Objects, mobile platform
4) Junaio - Marker Based, mobile
http://www.junaio.com/glue
Resources
Information in Layar using GeoRSS
geoRSS to Augmented Reality from Josh Harle on Vimeo.
Adding 3D Models to Layar
Setting up a 3D object in Layar with the geoRSS Layer - Part 1/2 from Josh Harle on Vimeo
Guest Lecture - Wednesday 12 January - 9-11amMichael Tawa
Dean Utian has arranged a Guest Lecture to given by Michael Tawa, on Wednesday !2 January, from 9-11am. You are all invited to see this interesting presentation.
Micheal's research is summed up by the following:
"Cinema and Architecture – a study of cinematographic compositional strategies and techniques, useful for spatial organisation and design practice.
Opportunities – spatialising cinematographic themes/strategies; translation to architectonic form; image/sound/text/spatial form juxtaposition; film/space projects, exhibitions, screenings"
(Taken from research agenda of School of Architecture, Planning and Landscape, University of Newcastle upon Tyne, UK, where Michael taught for a number of years.)
Date: Wed 12 Jan
Time: 9-11am
Room: Red Centre Theatre, G001


